Lightroom’s Reflection Removal Tool Revolutionizes Photo Editing
The Reflection Removal Tool’s debut was announced by Lightroom in the June 2025 release and effects photo editing surprisingly. The ultra reviews about using the tool are plus positive ensuring how it enhances the clarity and focus of the image.
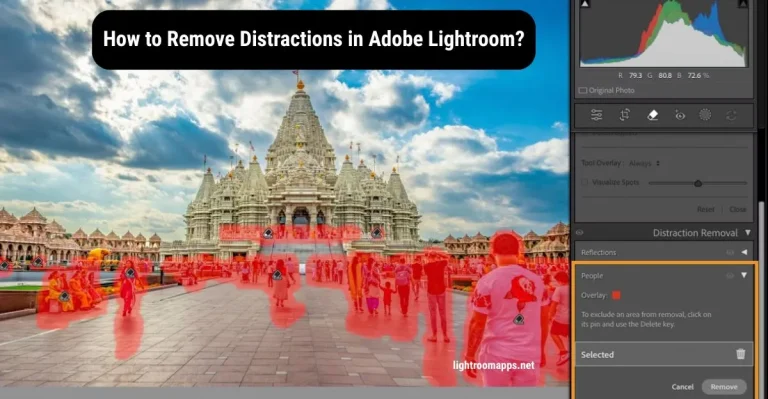
The AI-powered Distraction Removal Tool removes prominent windows Reflection allowing subjects to stand out. You can perform editing for both raw and non-raw files. Let us have a quick overview about how to use this tool for perfect photo editing.
Using Reflection Removal Tool in Lightroom
- Open Lightroom Classic and select an image having reflections.
- Tap on the Remove button > Distraction Removal.
- Open the Reflection panel and select apply.
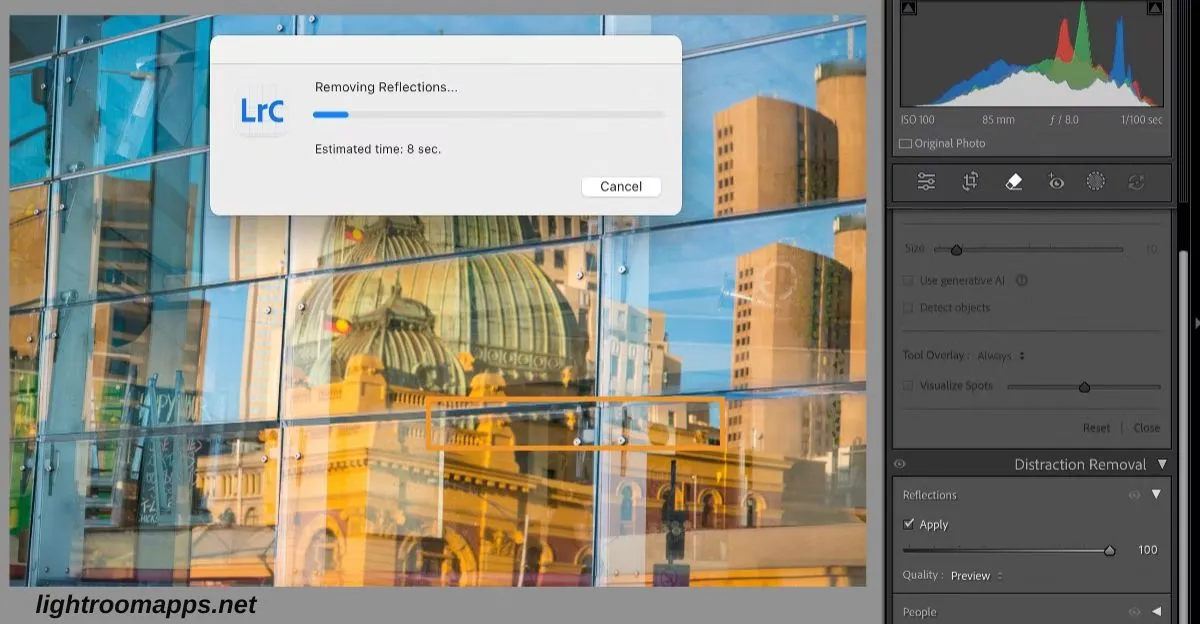
- Lightroom Classic has the automatic function to detect the reflections and remove them. Select the intensity of reflection using the Amount Slider.
- Set the slider from 0 to 100 to view the image with reflection and without reflection simultaneously.
- Now set the slider to -100, you will view the reflections only without seeing the original image.
- If the slider is showing reflections when set to +100, move the slider to -100 and then view the original image after reflection removal.
- The resolution of the image depends on the quality. Tap on one of the following options:
- Preview – This option provides the lowest resolution, fastest to process, and is the perfect option for social media content.
- Standard – It refers to an intermediate resolution, an ideal option to view images at the normal screen resolution.
- Best – It takes the longest to process but this is the ideal full resolution.
Best Tip – Don’t use other features and tools to edit the image before adjusting reflection.