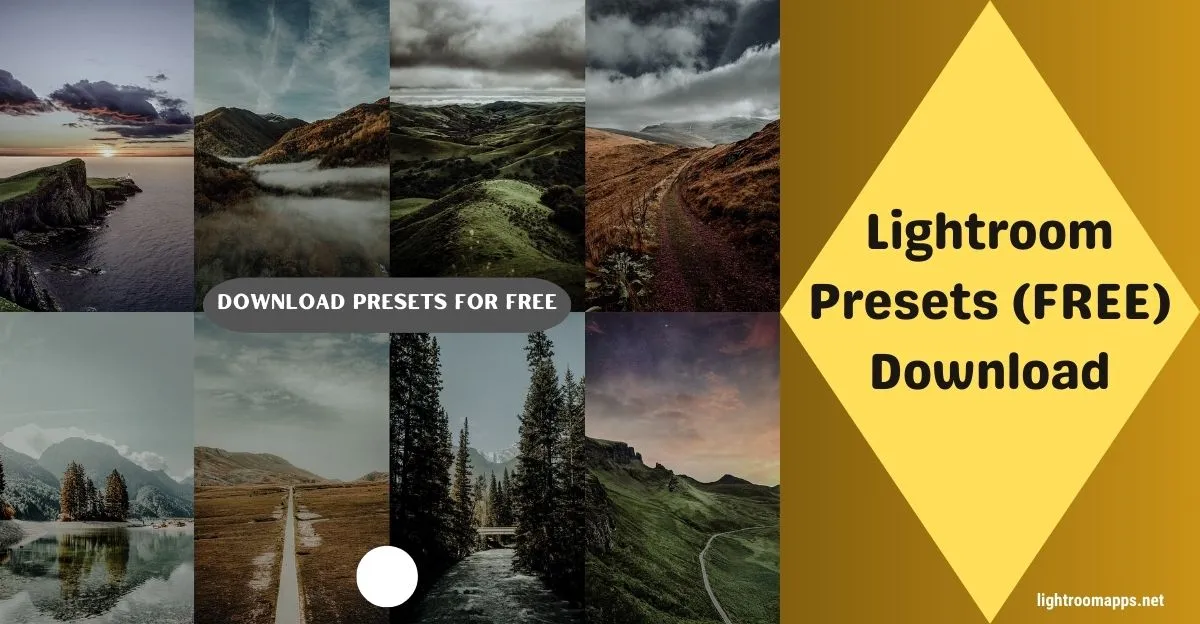
30+ Free Lightroom Presets For a Consistent & Professional Look 2025
If you are a video editor or a photographer, you may get tired of making necessary edits by spending hours.
Still, professionalism will be lacking when you compare your work to that of other editors. Do you prefer to improve it and make it stand out with only a couple clicks?
The solution is in your hands, and it is in the form of Adobe Lightroom Presets. According to Gary Grinaker, a retired professional photographer;
Photographers always use presets in Lightroom as custom presets, which starts the editing process closer to their preferences. It improves editing accuracy and saves a tonne of time.
Here, you will get a complete guide about downloading these presets, how to use them, and their pros and cons.
To make your editing skills exceptional, you can download these free 30+ presets, which will add a fascinating element to your Editing.
What are Lightroom Presets?
To make your Editing way faster and save you time, the only thing that plays its role in Adobe Lightroom is “Presets.”
They are the pre-made settings that assist users in applying a single effect to a multitude of images with a single click.
It will give your images a maintained consistent look and save a lot of time. Users simply need to remember to download the particular presets that they require.
Because some presets may not help them achieve the results that they desire to see in their work.
Also Check : Best Lightroom HDR Presets Collection (Free)
Download 30+ Presets for Free in Lightroom for Mobile & PC
Contrast Preset for Mobile & PC
This is the best preset that enhances the colors in your images and videos to a maximum level and improves user experience.

Blue Preset for Mobile & PC
This preset contains a magical blue color to add magic to your image and is known as the most trending preset.

Banff Preset for Mobile & PC
It adds crystal blue color, enhances brightness, and adds natural colors to the images.

Majorelle Preset for Mobile & PC
Add smooth colors to your images to give a stunning look with splitting tones and a creamy look.

Carmen Beach Preset for Mobile & PC
Modernize your image using this preset and add crystal blue, natural, and warm glowing colors.
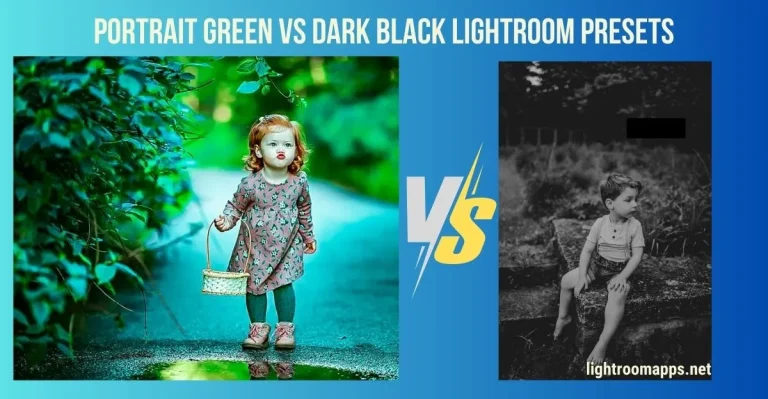
Read Also – How to use Portrait Green and Dark Black Presets?

Atlanta Preset for Mobile & PC
It enhances beauty and makes the images more dramatic.

Halloween Preset for Mobile & PC
Enhances the beauty of your images by adding colors in a non-destructive way using Halloween pictures that are handcrafted.

Goddess Preset for Mobile & PC
To enhance your RAW images, the Goddess preset provides 13 filters. It is universal, turns your shots into stylish ones, and gives a summer look to your pictures with a soft and sandy effect.

Bourbon Presets for Mobile & PC
It enhances your images in a natural and eye-pleasing way to achieve consistency, recognizable Style, and a stunning mood.
Blondie Preset for Mobile & PC
It is a warm preset that contains sharp colors and gives your skin a slight Tan look. It converts RAW photos to professional ones.

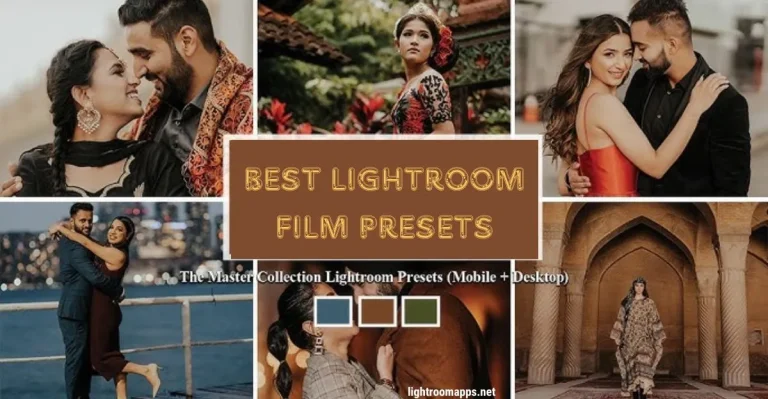
Lightroom Film Presets for Mobile & PC
The best preset for individuals who are not professional video and image editors. You may get free Lightroom Film Presets to make your digital photos filmy.

Duotone Presets for Mobile & PC
If you want to add dual colors to your single images and give your pictures a more professional look.

Aruba Lightroom Preset for Mobile & PC
These Lightroom presets provide a warm look with accent blue, turquoise, whitish, and dreamy tones in the images.

Outdoor Presets for Mobile & PC
It gives simple images a fascinating look using outdoor shoots and unique and stunning filters.

Marmalade Presets for PC & Mobile
It instantly transforms your images into a good one and enhances your images with a mixture of orange-silky colors.

White Smoke Presets for Mobile & PC
The White Smoke Presets add bright colors with a smooth and soft touch to the images.

Read Also: How to do batch editing in Lightroom?
Frothy Presets for PC & Mobile
It works in a non-destructive way to achieve a high-quality look and contains 13 unique filters with smooth and soft touches.

Camellia Presets for Mobile & PC
The Camellia Presets enhance the beauty of images using a silky soft pink tone and provide a professional look.

Bourbon Presets V2 for Desktop and Mobile
It uses a collection of mixed colors to give a more professional look to your images.

Filmstreet Presets for Mobile & PC
It converts your street photography to cinematic masterpieces and adds beautiful effects and high-contrast tones.

Film Effect Lightroom Preset For Mobile & Desktop
It helps amateur and professional photographers to add changes like contrast and brightness and make high-quality images.

Free Analog Preset for Mobile & Desktop
It converts your simple images and gives a fabulous look to dark images.

Vintage Film Presets for Mobile & Desktop
The Vintage Film preset converts simple images to cool and eye-catching images.
Terra Film Presets for Mobile & Desktop
The Terra Film presets to transform your simple images into the most fabulous looks.

Simple Method of Using Lightroom Presets After Import
- To edit your selected photo, open your Adobe Lightroom app.
- Select the photo and then open the “Edit Menu” to access the editing tools.
- Locate the image in the menu and press the “Presets” button.
- Open the “Yours” Category from the Presets menu and then open the ‘Saved Presets.’
- You can scroll all over the presets and choose the one that you require for Editing.
- Continue fine-tuning Editing after applying the preset, and access the editing tools and sliders to achieve your desired outcomes.
Read Also: How to install and import presets in Lightroom (Mobile & Desktop)?
PROS and CONS of Using Lightroom Presets
PROS
CONS
How do you install Lightroom Presets on a PC or Mac?
We will briefly describe how to download the Lightroom presets on PC, Mac, and Android smartphones.
But before you go for PC installation, make sure that you are selecting the installation method according to the preset file.
Installation Method for LR Templates
→ First of all, you have to download your desired preset—zip Format.
- Being a Windows user, Open the Lightroom app > Visit the Edit Section > Preference.
- Being a Mac User, Open Lightroom App > Visit Lightroom > Preference.
→ Hit on the “Preset” Tab.
→ Press on the ‘Show Preset Folder’ and you will see all presets.
→ Scroll to the Develop Preset present in the Lightroom folder.
→ Now restart the app and enjoy it with your desired presets.
Note – By visiting the Presets section on the left side, you can see all the presets.
Installation Method for .XMP Files
→ Download your desired LR preset.
→ Open the Lightroom app > Visit the Develop Module > Hit the File Button > Press Import and Develop Profiles and Presets
→ Scroll on the Preset Folder > Hit on the desired. ZIP File (you may select . XMP file)
→ Now, visit the Preset section in the left corner, where you will see all the downloaded presets in the app.
Read Also: Let’s have a concise overview of Lightroom vs Darktable to choose the best between them.
How do you download the Lightroom Presets on Android smartphones?
We provide two methods for Android users to download the Lightroom presets. You can choose any of them at your convenience.
Method 1 – Simple, Easy, and Highly Recommended
- Via any of the aforementioned techniques, install the Lightroom presets on your Android device.
- Via Cloud, you will see all the presets sent to your Android smartphone.
Note – If you are using Lightroom CC, this method will exceptionally work for you but not for Lightroom Classic.
Method 2 – Without Installing Lightroom App on the Desktop
- Download your selected preset in the. ZIP format.
- Open the Lightroom app on your Android and choose the images for which you want to apply the preset.
- Hit the Three dots > open preset Tab
- Scroll to the Preset folder and find where you have downloaded the preset. Now import this preset.
- You can see all presets ready in the Preset folder for use.
Installation Process for Lightroom Presets in iOS, iPhone, and Mac
→ Download your desired Lightroom preset.
→ Open the app and create a new folder by clicking on the “+” button in the library section > Set the name for the folder as “Presets” > Create a new Album
→ Open the Album > Hit the Add icon > Import new images
→ Scroll to the.DNG files > press “+” > Open this button
→ Click the three dots, select “Create Presets,” and the photo will open from the menu that appears in the upper right corner.
→ After the preset pack, name the preset and save it.→ Whenever you upload the.DNG files, you have to repeat the last two steps every single time.
Also Read: How to make a collage in Lightroom?
How may I save Lightroom Presets from the “Discover” Tab?
- Tap on the Adobe Lightroom Shortcut available on your desktop.
- Scroll your cursor over the images in the Discover Tab to select the photo whose Style you want to see in others.
- The “Save as Preset” option is located in the Discover Panel’s upper right section.
- To choose the photo where you want to apply the preset, switch to the “All Photos Tab.”
- Find the “Edit Menu” and access the editing tools to ensure certain Editing. Select “Presets” and find the ‘Saved images from the Discover Tab’ in your category.
- Now select the preset that you have chosen from the “Discover Tab” and apply it to your photo.
- Among the available editing options, continue the fine-tuning Editing and get the required result.
How to save Lightroom Presets?
Whether you are using the Lightroom presets in LR classic or CC, the process of saving them is the same.
→Open your Desired Preset > Right-click on it > Export Preset > To Specific Folder.
Lightroom Presets “The Time-Savers”
If you want to make your photographs consistent and efficient by applying specific looks and styles, presets are the best option.
They additionally save your time, but they also give your photos a superior, contemporary, and remarkable look.
However, they work better on RAW photos than on JPG photos. Make your pictures super cool by downloading your desired presets from our page.
Note: Learn the ways to update Lightroom Classic!
Important Concerns about Lightroom Presets in 2025
Final Thoughts
If you are a busy person but want to gain efficiency in your editing, Adobe Lightroom presets are the best things to use. Certainly you can minimize time, but you can also increase the productivity of your work.
Download your presets right now and don’t forget to know the basic guidelines about how to import Lightroom presets.