How to Install and Import Presets in Lightroom (Mobile & Desktop)?
Are you tired of falling behind on editing, spending hours tweaking images one by one?
Creating a unique, aesthetic look for every photo can be exhausting—especially when trying to maintain consistency.
Imagine, you are doing batch editing of 50 images and you have done it in only ten minutes. Do you find it real or fantasy?
That’s where Lightroom presets come in—they save time and effort while helping your images stand out with a distinct visual style.
Presets allow you to apply the same edits across multiple images with a single click, helping you speed up workflow, maintain a consistent theme, and personalize your style with ease. The below guide covers every aspect to import presets and make changes to images.
What are Lightroom Presets?
To transform your images in just a single click presets are known as the saved group of photo editing settings.
They are a source that fits your editing image without wasting hours and achieving incredible results.
They are a configuration of settings that you utilize to achieve a certain look of your image after editing. Photographers have shared their love for using Lightroom presets as;
Lightroom presets are like Instagram filters; putting them once can make you change anything about them. For instance, while editing a sunset preset, a preset can assist you with different ideas about unique colors, vibrance, and contrast levels.
Preset refers to a combination of settings that can be saved before image editing for a specific outcome. You may create your own presets or buy any that suit your needs.
If you are a content creator, blogger, photographer, videographer, and influencer, you will know that maintaining a stunning look is nearly impossible without presets.
They can assist you in speeding up batch editing, create a consistent theme, simplify editing, and customize styles.

Basic Methods to install and import Presets in Lightroom Classic
Before installing and importing presets in Lightroom classic, keep in mind, the supported formats for presets are .XMP files.
Method 1 : How to install Presets using the “Import Presets” Option?
- Download your desired LR presets to your PC that will be available in .XMP and .lrtemplate formats.
- Find the “Develop Module” on the top right corner of your Lightroom screen.
- You will see the Presets panel on the left side of the Develop module. If you can’t find it, click on the small triangle icon to expand it.
- Right click your cursor on the Presets Panel and tap on the “Import” button.
- A file dialogue box will appear on your screen. Move your cursor to the place where you have downloaded the presets.
- Select the file of Presets that you desire to install.
- Tap on the Import button once the installation is done.
- To access all the presets easily you can choose the organize option provided from Lightroom. Create a new folder by clicking right on the “Presets”, name the folder, and drag related presets into it.
- You will see under the “User Presets Section” that your presets are imported.
- Tap on the Preset name you want to apply on any image and check the preset adjustments on the selected image.

To give a filmy look to your digital images, download the best lightroom film presets and give your images an aesthetic look.
Method 2: Drag & Drop Method to Import Presets in Lightroom Classic
- First of all, download your desired presets that you want to install.
- Open File Explorer (Windows) or Finder (macOS) and navigate your cursor to the place where you have downloaded the presets.
- Select the Presets File that you want to import and drag it directly to the Lightroom Windows.
- You will see a dialog box titled “Imported Presets” by Lightroom as it automatically detects them.
- Tap on the Import button after selecting it.
- Within the “Presets Panel” you can again create folders to organize your imported presets according to your needs.
- You can find your imported presets under the “User Presets Section”.
- Click on the preset name to apply it on your desired photo and check the preset adjustments made by Lightroom on the selected image.
Download the best HDR Lightroom presets collection for free and make your editing work more compelling.
Method 3: Utilize Lightroom Classic Preference to Import Presets
- Open the Lightroom Classic and tap on the “Preferences” button.
- In the Presets category, select the “Show Lightroom Develop Presets” option.
- You can copy or move the downloaded presets file to the “Develop Presets Folder.”
- Organize your presets by creating the subfolders within the folder so you can access them easily.
- Restart the Lightroom Classic to check whether it has imported new presets.
- You can observe the imported presets in the “User Presets Section” and use them for your desired images.

How to Import Presets on Lightroom Mobile?
Method 1: Sync Lightroom Mobile with Desktop
If you import presets on Lightroom Windows or PC, these will automatically save on your Lightroom Mobile.
This is possible due to Adobe Creative Cloud synchronization. If your Mobile and desktop are connected to the cloud, there is no need to import presets separately on your Mobile.
Method 2: Import Lightroom Presets using DNG Files
- First of all, download the Lightroom Presets in the DNG Format. The preset settings will be applied to these DNG files.
- Tap on the “+ icon” >> or add images option >> import DNG Files.
- Now select the “Form Files.”
- Move your cursor to the place where you have downloaded presets.
- Select multiple DNG files (based on your requirements) that you want to import.
- Tap on Add>> Import to import them in Lightroom mobile.
- Select the “Create Preset” or any similar option in the options menu to save the editing settings.
- Name your preset in the dialogue box to reflect the style or adjustments.
- After naming your preset, click the “Save” or “Create” icon.
- Open the Lightroom Mobile Presets library and check whether it contains the newly created preset.
- If you want to apply preset on any other image, choose the preset where you have imported it.
- If you’re going to make any more changes, the editing tools can help you make additional adjustments.
- Once the editing is completed, save and export your photo.
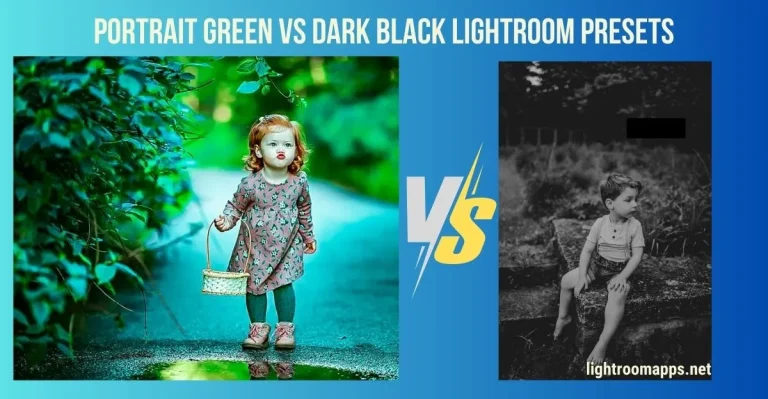
Also Read- How to use Portrait Green and Black Dark Lightroom Presets?
Method 3: Simple Method to Import User Presets (Most Recommended)
- Once you have installed Lightroom on your Android device, start it.
- Create a new project or open your desired image that needs to be edited.
- Click on the “Presets” icon at the bottom.
- Tap on “Import Presets” by clicking on the three dots.
- You will see a file browser on your screen; navigate your cursor to the “Presets Folder.”
- Select multiple preset files (if needed) that you want to import.
- Click on “Add” >> “Import” in the Lightroom mobile app.
- You can see the imported presets in the Presets Panel.
- Select any of the presets that you want to import on your image.
- You can make any further adjustments if required and save the final image.
How to use Presets in Lightroom Classic?
Also Read: Let’s have a look at the comprehensive comparison of Lightroom vs Capture One.
PROS and CONS of using Lightroom Presets
PROS
CONS
Common Issues while Importing LR Presets
Here are some common issues that users should know to import presets in Lightroom easily.
It really helps to troubleshoot such problems and import presets with ultimate ease. For instance, your presets may not appear on the screen after import.
If this happens, you need to check out the following things given below;
Note: Learn to add watermark to Lightroom!
Significant Questions about Importing Lightroom Presets
Wrapping the Conclusion!
I hope the article resonates with your needs to install and import Lightroom presets. You may use the built presets or download Lightroom Presets for Free from some authentic websites.
Choose any of the above simple methods and start using presets to make your photography/videography more stunning.