How to Use Dark Green Lightroom Presets in 2026
One of the biggest challenges every photographer or editor faces in Lightroom is knowing which presets to trust and how to apply them correctly. Most beginners aren’t sure which style actually adds a professional finish to an image instead of just changing its color.
Dark Green Lightroom presets are earthy and moody which solves that problem, whether you shoot portrait, landscape, or nature photography. It gives your images a cinematic edge in a single click, and once you know how it works, it’s one of the fastest ways to build a consistent look for your Instagram feed or portfolio.
What Are Dark Green Lightroom Presets?
This preset style is built to add a deep, cinematic green cast to an image while pushing the blacks and shadows down for contrast. The green typically shows up in skies, foliage, and mid-tones, while the shadows and blacks are pulled darker to add depth. Together, this gives photos a dramatic tone that reads as more polished than a standard color edit.
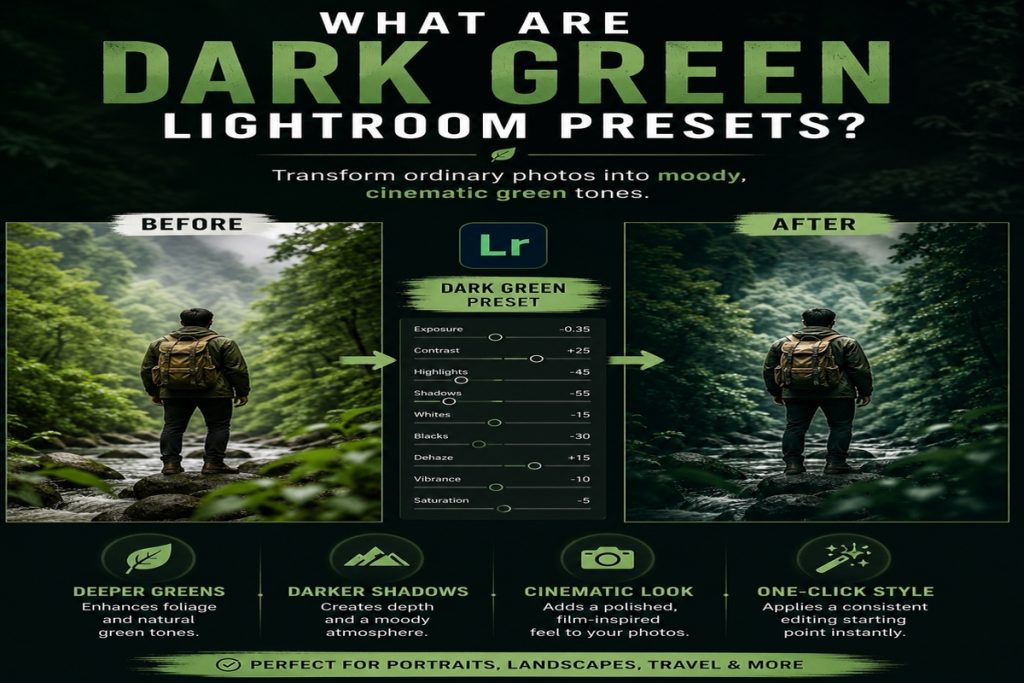
The look works especially well on outdoor portraits, cityscapes, forests, and golden-hour shots where there’s already some green or warm light in the frame to pull from. Woodland and forest scenes in particular tend to make the green tones feel rich rather than artificial.
Also Read- Best Lightroom Film Presets for Free
How to Install and Apply the Preset
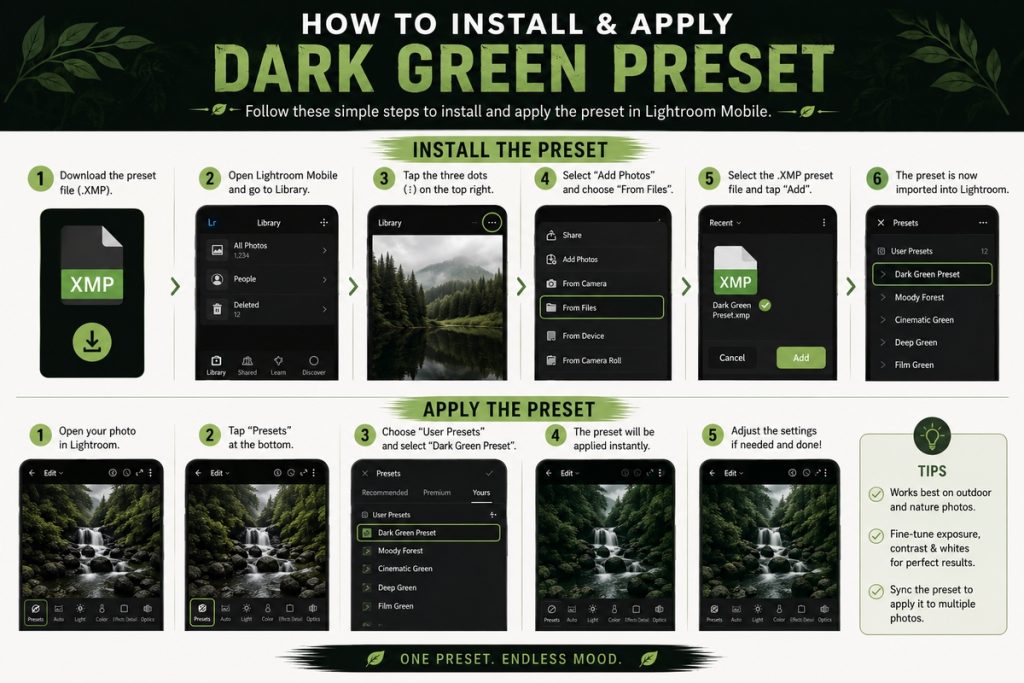
- Open Lightroom (desktop, Classic, or the free Lightroom mobile app) and make sure you’re signed in with your Adobe account.
- Download the preset file. It will usually come as an XMP file, and sometimes as a DNG for mobile or an LR Template for older Classic versions.
- On the desktop, go to the Develop module, open the Presets panel, and click the “+” icon or File > Import Profiles & Presets, then select the file.
- On mobile, open a photo, tap the Presets icon, tap the three dots, and choose Import Presets, then select the file from your downloads.
- Select an unedited image from your library and apply the preset from the User Presets folder.
- Fine-tune the exposure, shadow, and green saturation settings to match the specific photo, since presets are a starting point, not a final edit.
- Export and share.
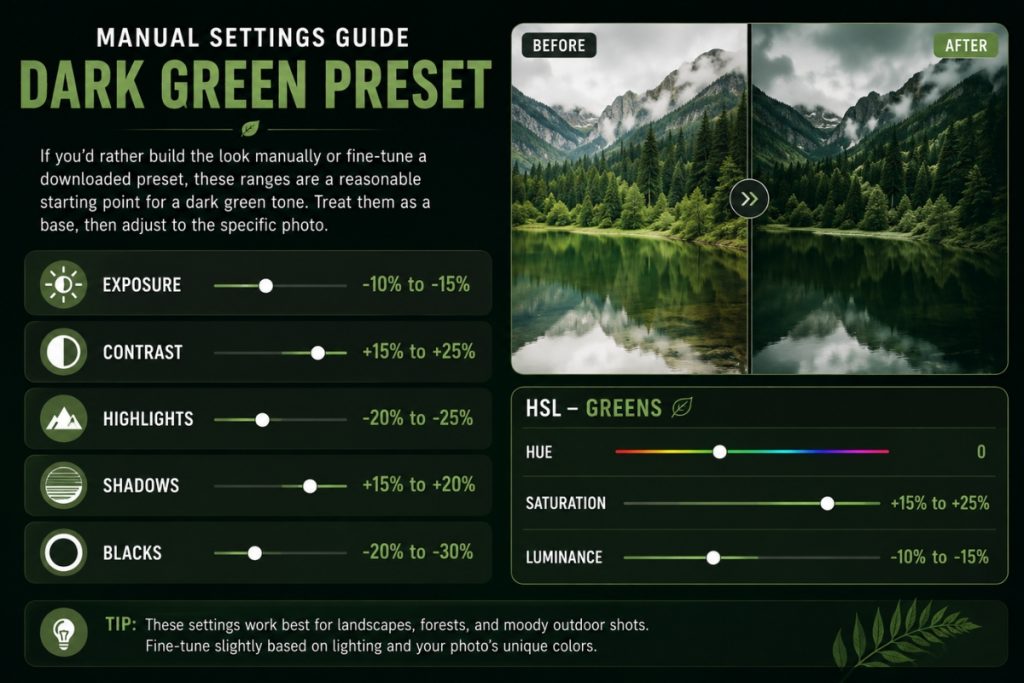
Starting Slider Values for a Dark Green Look
If you’d rather build the look manually or fine-tune a downloaded preset, these ranges are a reasonable starting point for a dark green tone. Treat them as a base, then adjust to the specific photo.
Also Read- How to import and install Lightroom Presets?
Benefits of This Preset Style
Also Read- How to import and install Lightroom Presets?
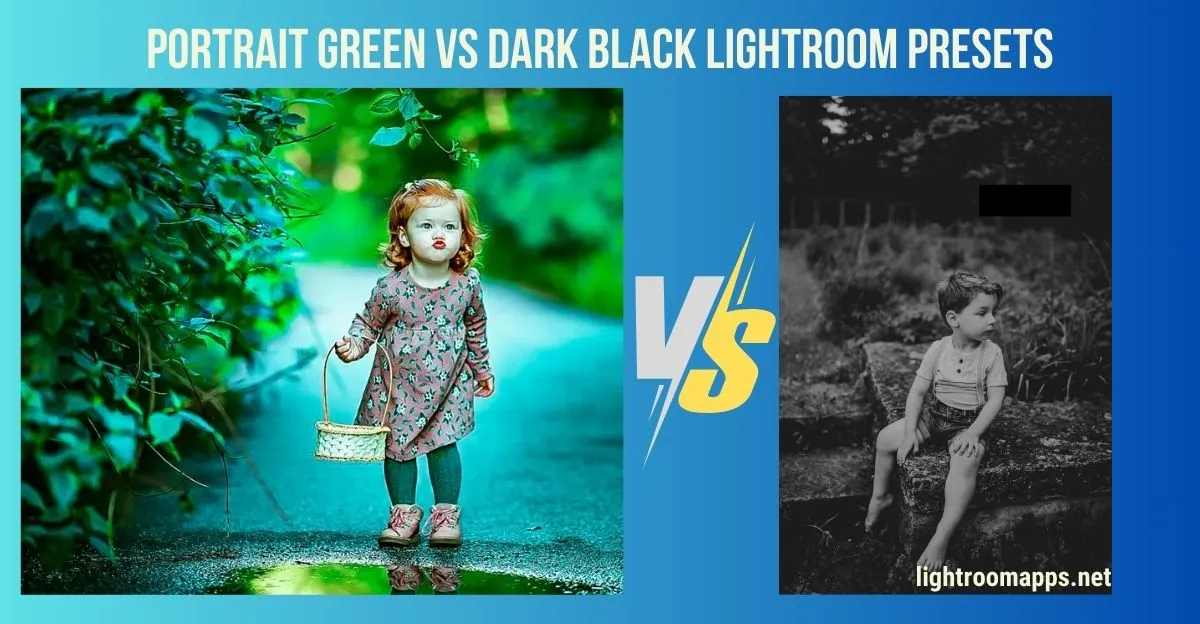
What About Black Dark Presets?
Black dark presets are a related style worth knowing. Instead of leaning into one color the way a dark green preset does, they lower overall exposure and crush the blacks to build a deep, moody base across the whole image.
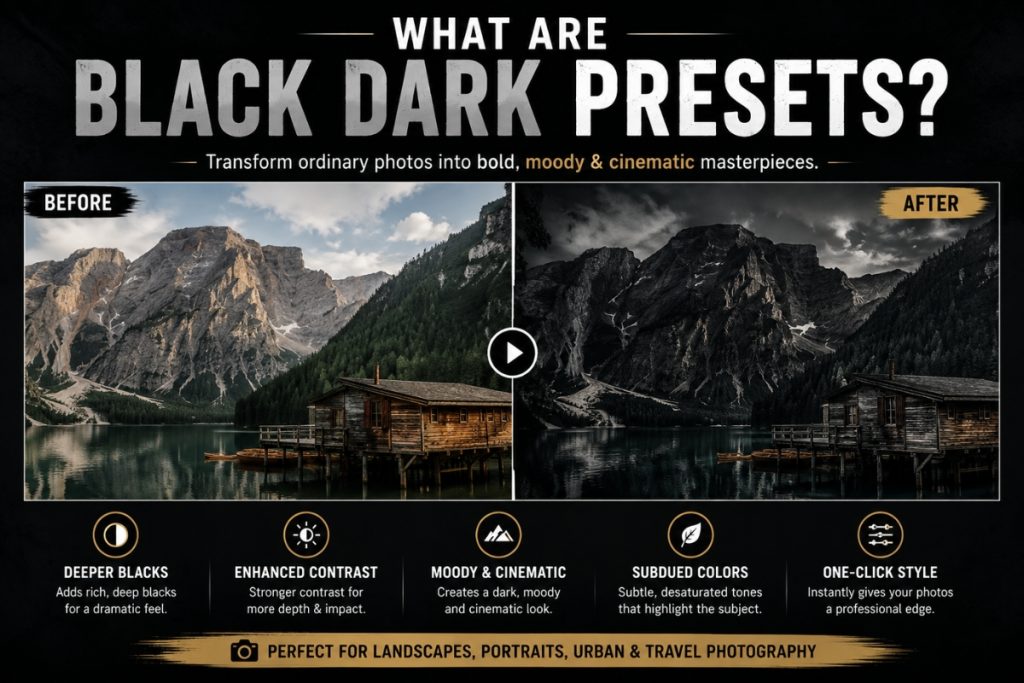
This adds contrast, depth, and an emotional weight to a photo, and many black dark presets also add a touch of vignette or shift the shadows toward a colder, more dramatic tone. They install and apply the same way, through Lightroom’s own Presets panel.
Note: You can also check the older versions of Lightroom.
Does This Work With the Free App?
Yes. You don’t need a paid subscription to apply a dark green Lightroom preset. The free Lightroom mobile app lets you import custom XMP, DNG, and LrTemplate files and use core editing tools like exposure, color, and detail at no cost. A premium subscription mainly unlocks extras like Premium Presets, the Healing Brush, selective and AI-based adjustments, and cross-device cloud sync, none of which you need just to apply and fine-tune the preset.
Troubleshooting Common Import Issues
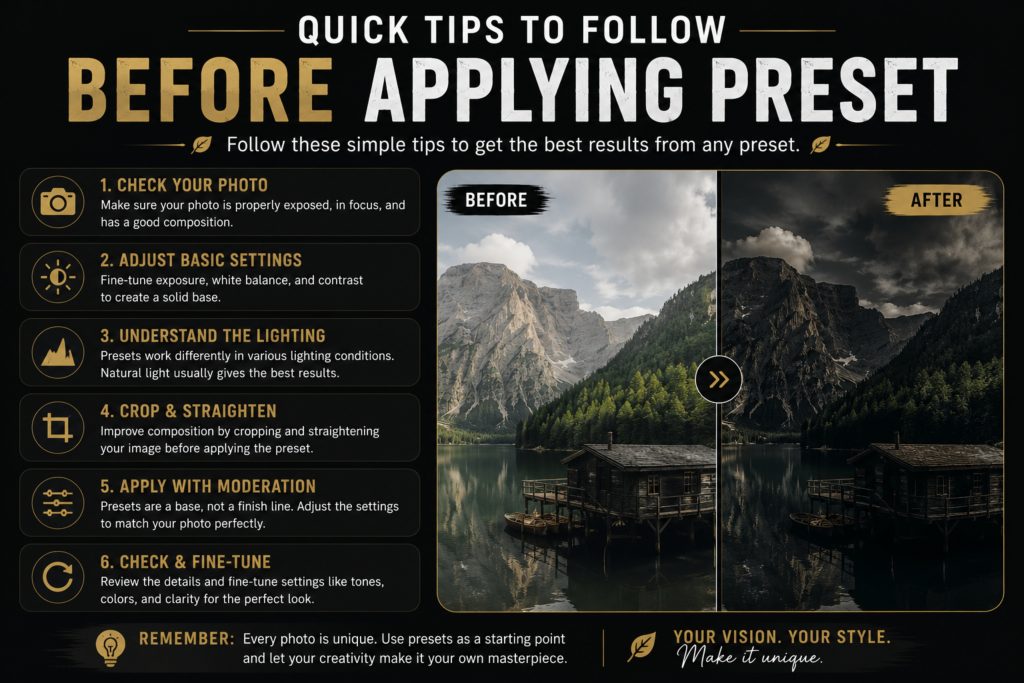
Quick Tips Before You Apply the Preset
Note: Have a look at the comprehensive comparison of Lightroom & Camera Raw!
Frequently Asked Questions
Wrapping it up!
This dark green, earthy preset style brings a cinematic, moody edge to portraits and landscapes without hours of manual color grading. Installing it the right way through Lightroom’s own Presets panel, setting your white balance first, and making a few local tweaks for portraits will get you the most out of every shot, whether it’s headed to a client gallery or straight to Instagram. From there, testing a wider range of presets is the fastest way to figure out which look fits your editing style best.