
How to Fix Blurry Photos in Lightroom (2026)
A blurry image never catches the attention and loses its visual appeal quickly. Your shutter may not have fired at the right moment, or your focus point may have landed on the wrong spot, and either one can leave you with a soft, unusable shot. The good news is that you can fix blurry photos in Lightroom using a handful of proven tools, and you do not need to be an editing expert to unblur your pictures and get real results.
Adobe’s editor turns annoying blurry images into sharp ones through its sharpening, clarity, and AI-powered panels. However, you can only get the most out of these Adobe tools once you know how each one works and when to reach for it.
How to Fix Blurry Photos in Lightroom?
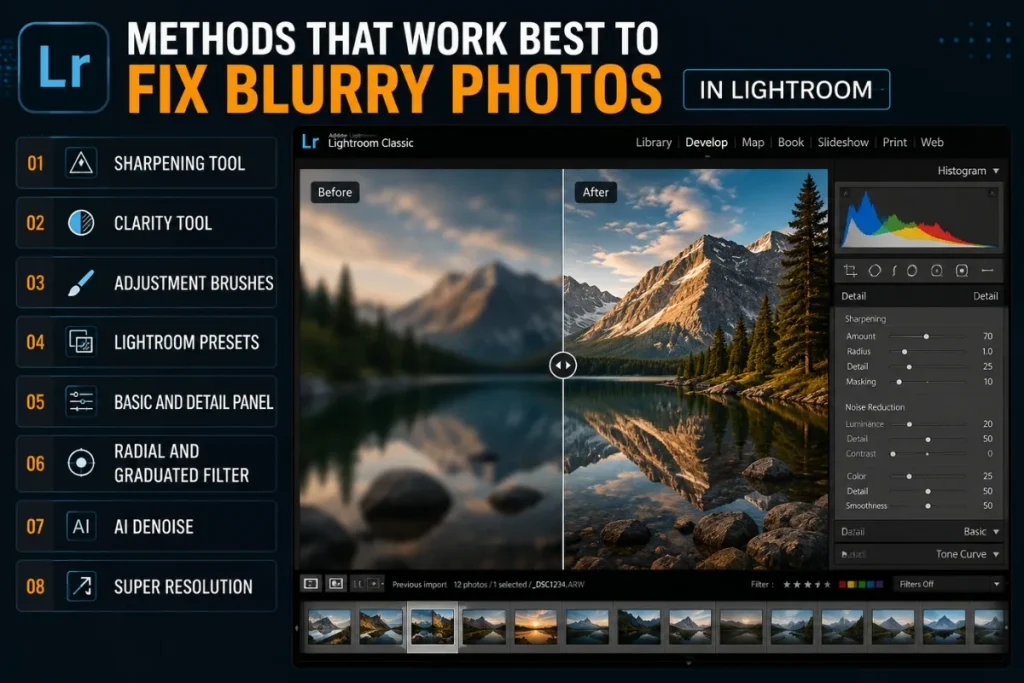
The quickest way to fix blurry photos in Lightroom is the Sharpening tool in the Detail panel, though the best method depends on the type of blur you are working with. If you have used it for various purposes, you already know it has several effective ways to unblur images. Here are the methods that work best:
I am going to walk through each method so you can edit your blurry images in Lightroom with confidence. Pick the approach that best fits the photo in front of you.
Sharpening Tool: The Best Approach
The Sharpening tool is one of the most effective and in-demand ways to fix blurry images in Lightroom. Open the Develop tab and you will find it inside the Detail panel. By adjusting a few sliders, you can noticeably improve blurred images in seconds.
Navigate to the right panel and check the Details section. Here you will find four sliders: Amount, Radius, Detail, and Masking.
Amount – Controls how much sharpness is applied. Push it right for a crisper look, or pull it left to keep the effect subtle.
Radius – Controls how far the sharpening effect reaches from each edge. The ideal starting value is 1.00, though you can raise it for more pronounced sharpness.
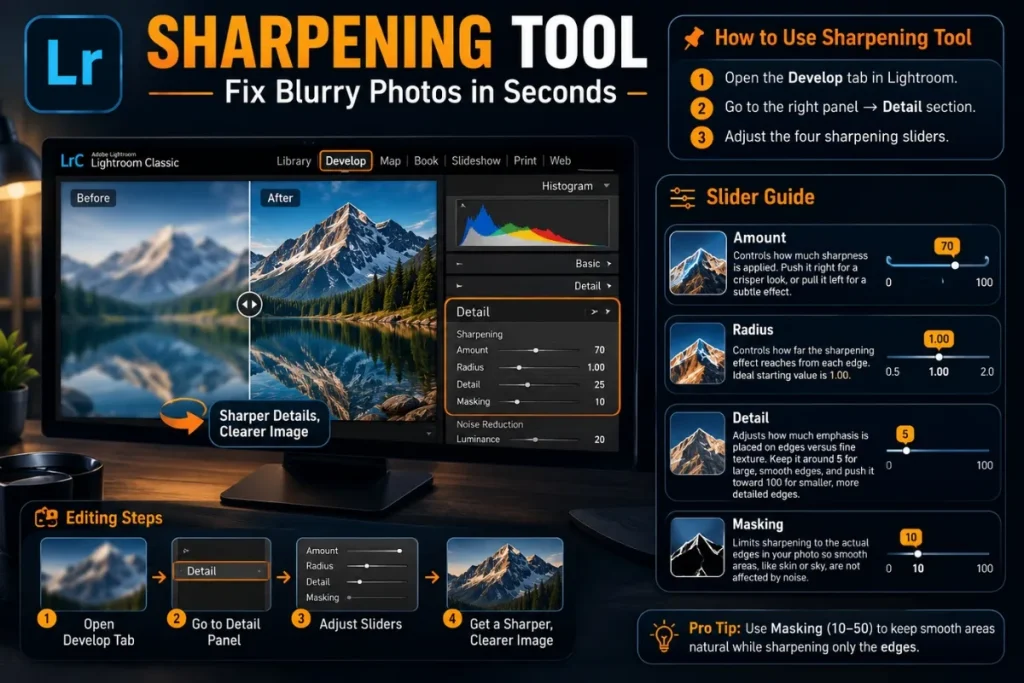
Details – Adjusts how much emphasis is placed on edges versus fine texture. Keep it around 5 for large, smooth edges, and push it toward 100 for smaller, more detailed edges.
Masking – Limits sharpening to the actual edges in your photo so smooth areas, like skin or sky, are not affected by noise from the Amount or Detail sliders.
Used together, these four sliders let you sharpen and unblur the parts of an image that need it while leaving smooth areas untouched.
Clarity Tool – Give an Extra Impact
One of the best ways to add extra punch and fix blurry images in Lightroom is the Clarity tool. It works by boosting mid tone contrast, which makes edges and textures appear more defined without the harsh look of over sharpening.
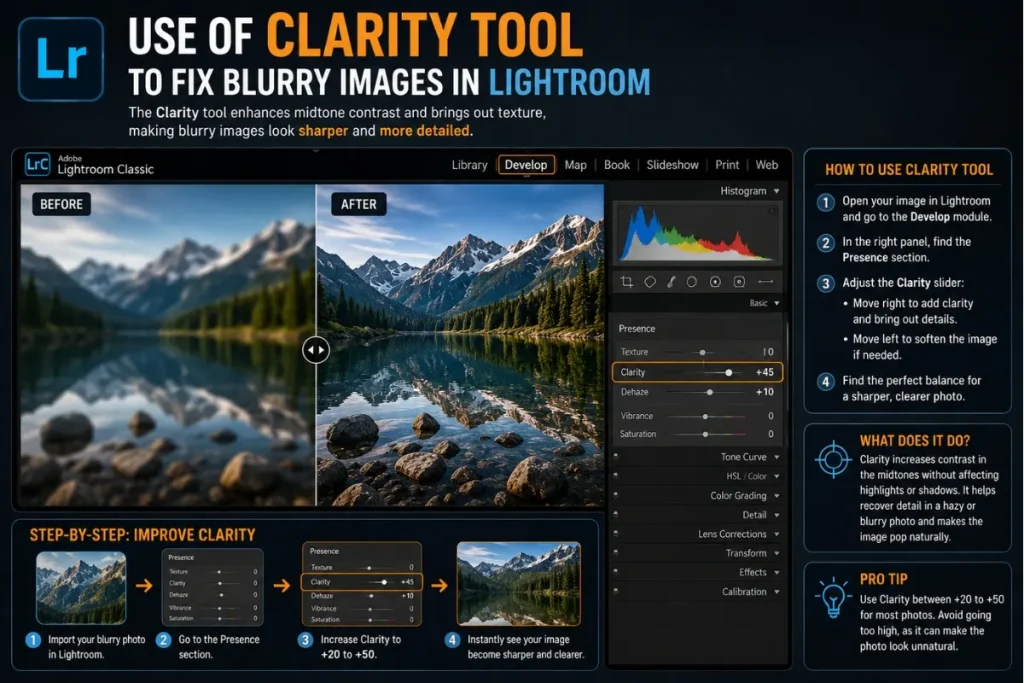
Be careful not to overdo it. Pushing Clarity too far creates an unnatural, harsh-edged look, especially once the image is printed. Aim for a natural, believable result instead.
Adjustment Brushes – Easily Accessible Tool
Using the adjustment brush to fix blurry photos in Lightroom is one of the most flexible techniques available, especially when only part of an image is soft. Open the brush tool in the Develop module and you will see the same sharpening-style sliders, but this time you can paint them onto specific areas.
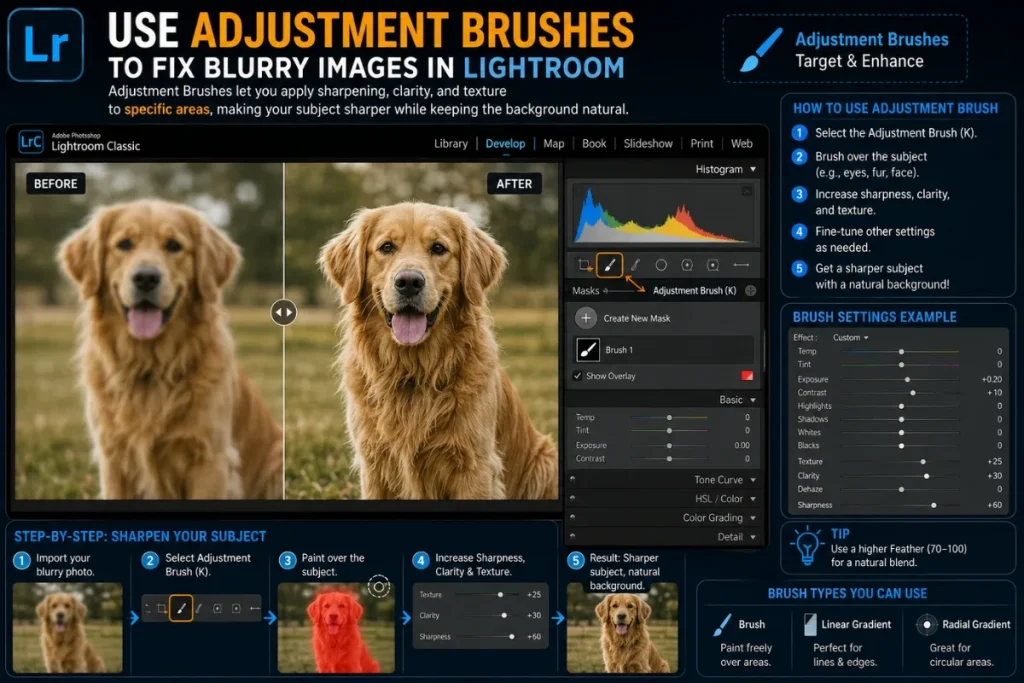
The keyboard shortcut “K” opens the brush tool instantly. Set your sliders first, then click the “+” icon to activate the brush. Paint over the blurry sections you want to unblur and sharpen, leaving the rest of the image untouched.
Fix Blurry Photos in Lightroom with Presets
Lightroom is well known for its presets, and using them to unblur photos in Lightroom is another simple method. Presets are pre-made adjustments built for a faster, more consistent workflow.
Here is a quick way to use presets for sharpness and overall image quality:
- Choose the photo you want to edit.
- Open the right panel and select the Presets tab.
- Browse the list and apply the one that best matches your image.
- If a preset does not look right, undo it and try another, or fine-tune it manually afterward.

Note – Here are amazing dark green presets with their ultimate benefits and uses. If you don’t know about how to use them, just go through it!
Basic and Details Panel – Efficient Editing Tools
The Basic and Detail panels work together as an efficient combination for fixing blurry photos in Lightroom. Start in the Basic panel to correct exposure, contrast, and white balance, since a dark or color-shifted photo will look low quality even after sharpening. Then move to the Detail panel to sharpen and reduce noise.
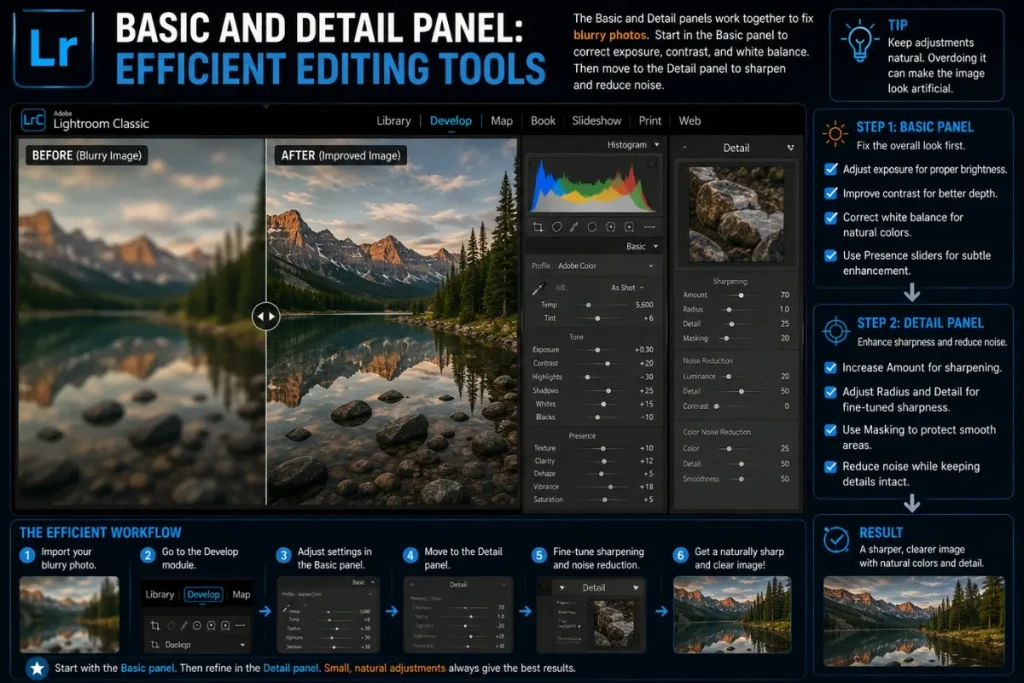
Keep every adjustment natural. Overusing these panels can leave an image looking artificial rather than genuinely sharp.
Radial and Graduated Filter – Versatile for Brightening
The Radial and Graduated filters round out the sharpening toolkit. The Radial filter lets you brighten or darken specific parts of an image, which can help a slightly soft subject stand out from its background.
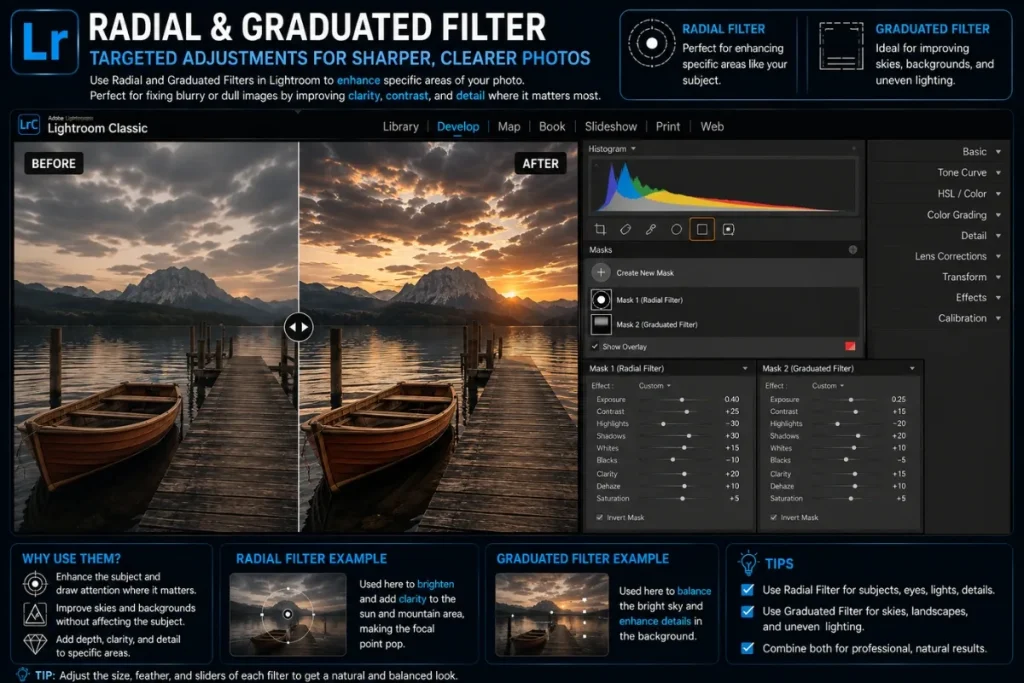
To use the Radial filter, open the Develop module and apply it to your image, then limit its reach with the masking tool if needed. The Graduated filter works similarly: open the gray rectangle icon in the sidebar and drag it across the image. Its built-in Feathering control softens the transition, and you can rotate the filter by dragging the centerline.
Also Read: How to Smooth Skin in Adobe Lightroom?
AI Denoise: Remove Noise Before You Sharpen
Denoise is Lightroom’s AI tool for clearing grain and noise from a photo before you sharpen it. Grain and noise make blur look worse, especially in low-light shots, so it pays to clean them up with noise reduction first.
Adobe Lightroom’s Denoise tool, found in the Detail panel, performs this noise reduction by analyzing the image and smoothing noise while preserving genuine detail. To use it, open the Detail panel, select Denoise, and adjust the Amount slider until the noise reduction clears the grain without softening important texture.
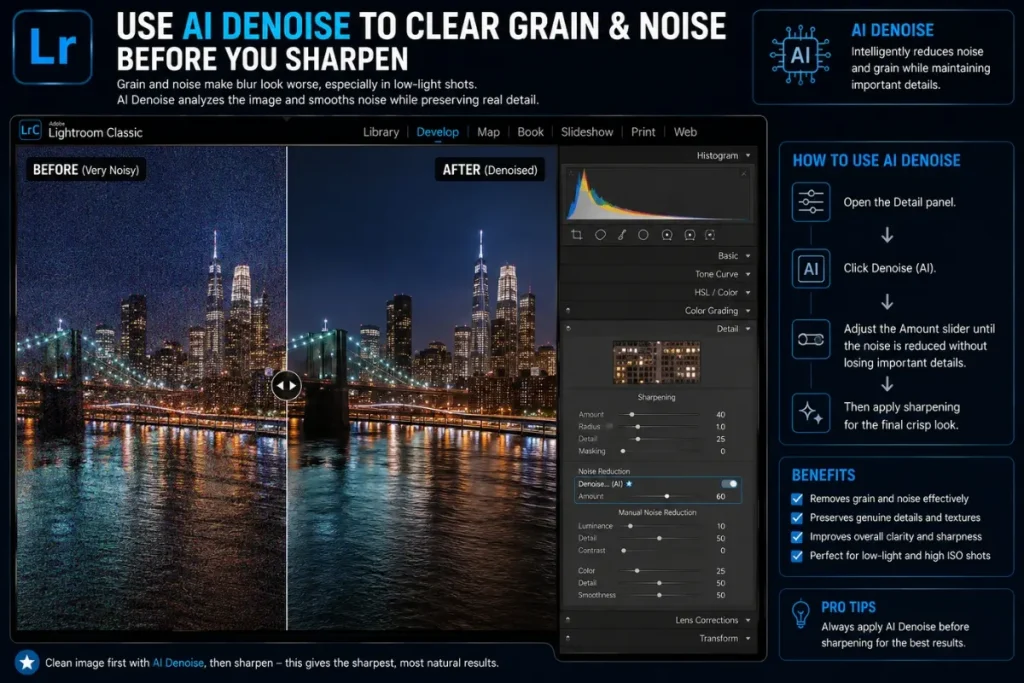
According to Adobe’s own documentation, Denoise currently applies to raw formats such as Bayer and X-Trans mosaic files, Linear DNGs, and Apple ProRAW files, and it does not work on non-raw files like JPEGs, TIFFs, or HEICs.
As of Lightroom’s June 2026 update, Denoise on Apple silicon Macs now runs through the Apple Neural Engine, which noticeably cuts processing time on M1 through M4 chips, so batch noise reduction no longer eats up as much of your editing session. Once you select Enhance, the app saves the result as a new DNG file rather than overwriting your original, so the source image stays untouched.
If you are working through a batch of similar shots, you can apply Denoise to several photos at once by selecting them in the grid and using the Enhance shortcut, and a recent Lightroom Classic update means you can keep working in the app while that batch processes in the background. Running this noise reduction step first, before sharpening, gives the Sharpening sliders a cleaner base to unblur from.
Super Resolution: Recover Detail in Cropped or Small Images
Super Resolution is an AI feature that adds resolution back into a photo, which helps when a blurry image is also small or heavily cropped. If your blurry photo is also small, heavily cropped, or was shot on an older camera, Super Resolution can help.
Per Adobe’s documentation, it doubles the linear resolution of your image, meaning the width and height both double, for four times the total pixel count, which gives you more data to work with when you sharpen. Unlike Denoise, Super Resolution works on raw files as well as JPEGs and TIFFs, so it is not limited to raw shooters.
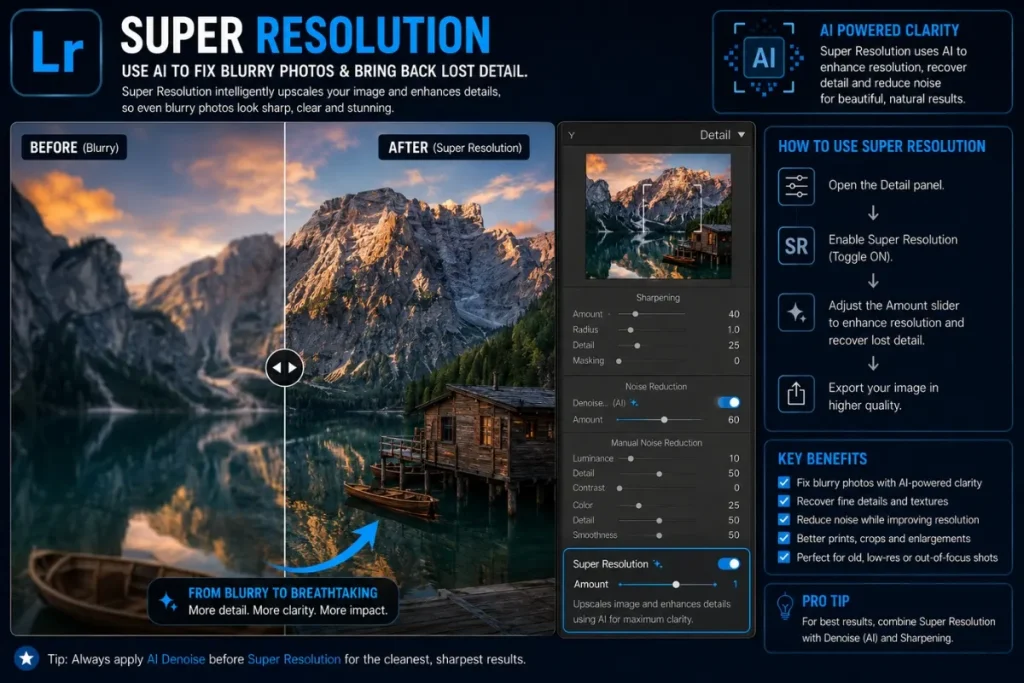
To apply it, right-click the photo, choose Enhance, select Super Resolution, and click Enhance to create a new, higher-resolution DNG file alongside your original. Note that the app will not let you reapply Super Resolution to an image that has already been enhanced, so it is worth getting your crop close to final before you run it.
Super Resolution will not undo heavy motion blur or bring a completely out-of-focus subject back into focus, but it does make mild softness easier to correct and holds up much better under sharpening or cropping than the original file would.
What Type of Blur Are You Dealing With?
Not all blur responds the same way to editing, so it helps to identify the cause before you try to fix blurry photos in Lightroom.
Note: Check out the different ways to rotate images in lightroom!
Can Lightroom Fix Every Blurry Photo?
Not entirely, and it helps to set the right expectations before you spend time editing. Lightroom can meaningfully improve mild blur, soft focus, and camera shake, but it cannot rebuild detail that was never captured by the camera. A subject that was never in focus, or a photo affected by heavy motion blur, will only improve so much no matter how far you push the Sharpening or Clarity sliders.
For those extreme cases, Lightroom now offers a built-in shortcut: a recent update lets you send a photo straight to a simplified version of Topaz’s AI Image Sharpener without leaving the app. Select the photo, go to the Photo menu (or right-click) and choose AI Sharpen, then pick Default or Strong and optionally apply Topaz Denoise at the same time.
This uses Generative Credits, and it is built specifically to reduce motion blur and recover detail in subjects that were never quite in focus, cases the standard Sharpening and Clarity sliders cannot fully fix on their own. For everyday softness, noise, and camera shake, though, the methods above are usually enough to fix blurry photos in Lightroom without spending any credits at all.
If you are still dealing with blurred images, and not satisfied with Lightroom’s performance, check out other Lightroom alternatives.
Why Do Photos Look Blurry in Lightroom?
Photos usually look blurry because of what happened at the moment of capture, not anything the editing process does to them. After covering how to fix a blurry image, it is worth understanding why photos end up blurry in the first place. The most common causes are:
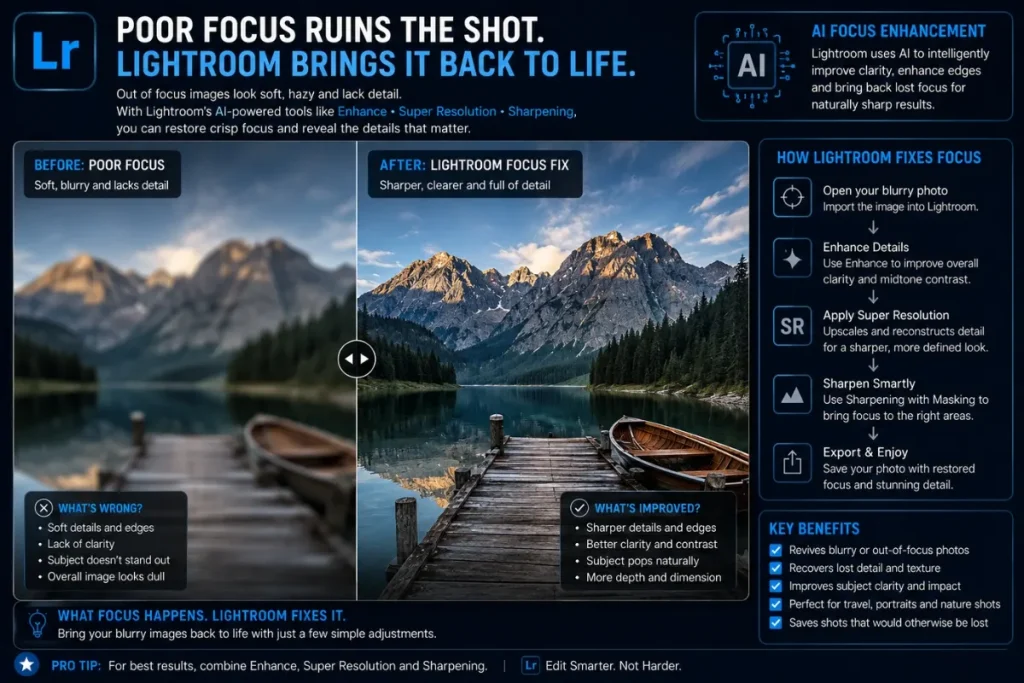
Poor Focus: The Hidden Enemy of Sharp Images
Focus problems are one of the leading causes of blurry photographs in photography of every kind, from portraits to landscapes. Moving too early, before the lens has locked focus, or failing to focus on the main subject, both lead to a soft image.
Releasing the shutter before the lens finishes focusing has the same effect. A photo taken in a hurry rarely turns out sharp, so it pays to slow down and let the camera focus properly.
Subject Movement: A Wrong Choice for Shutter Speed
Subject movement is another major cause of blur. If your subject is moving quickly and your shutter speed is too slow, the result is a blurry image.
A slower shutter speed almost always means a higher chance of motion blur. Choosing a faster shutter speed for moving subjects is the most reliable way to avoid it, since shutter speed has a direct effect on how sharp the final image looks.
Camera Movement: Blurred Images from a Shaky Camera
A shaky camera is the third major cause of blur. Shutter speed and camera stability work together here: the steadier you hold the camera, the lower your chances of ending up with a blurry photo.
How Can You Avoid Blurry Photos in the First Place?
A clear photo feels calm and intentional, while a blurred one struggles to convey its subject. Prevention is always easier than trying to fix blurry photos in Lightroom after the fact, so these tips will help you capture sharper pictures before you ever open the app.
Recommended Workflow Order to Fix Blurry Photos in Lightroom
The order you apply these tools in matters. For the most reliable results:
Following this order helps each tool do its job without fighting the one before it.
Frequently Asked Questions About Fixing Blurry Photos in Lightroom
Conclusion
You can choose any of the methods above to fix blurry photos in Lightroom, from the core Sharpening and Clarity tools to the newer AI-powered Denoise, Super Resolution, and AI Sharpen features.
Try the approach that best matches the type of blur you are dealing with, and remember that the built-in Lightroom tools work best on mild softness, noise, and camera shake rather than severe motion blur or a subject that was never in focus. Pair these editing techniques with the prevention tips above, and you will spend far less time trying to rescue blurry shots after the fact.